
In my previous article, I went into some detail about Javascript's shortcomings and how new ES6 features can alleviate those shortcomings. However, ES6's features can be used in other creative ways to make web development even easier.
Prerequisites:
- You should have read this article as a prerequiste before continuing.
- Firefox with CORS disabled in about:config
- Incase you get lost along the way, keep this gist of the finished project handy.
All browsers now enforce CORS. This forces modules to define their domain. Since we are developing a module locally this impossible.
For the duration of this tutorial we will have to disable CORS.
I recommend using Firefox for this as it can be disabled from
`about:config -> security.fileuri.strict_origin_policy`
Please re-enable CORS after this tutorial and before browsing the web.
Javascript defined UI's
Traditionally, if you write an application using Node.js you will be primarily doing work in Javascript.
There are even entire frameworks built around using Javascript to write HTML applications such as React.js.
These frameworks are usually being built using a Javascript runtime such as Node.js, and are translated or 'transpiled' into a codebase that a browser can understand.
While Node.js, and its huge module ecosystem is very nice I believe it is important to try to implement things without any libraries as it is conducive to understanding how everything works. This is especially important in the Web Development world as it is so open ended and there are 100's of ways to accomplish any one outcome.
Lets apply some of these new es6 concepts and write a simple widget that displays a users music listen history.
Setting up the Project
There are many ways to setup a web development project, since we aren't constrained to Node.js's project structure lets form our own.
Currently, I still prefer separating all of my languages into their own folders and just leaving an index.html and index.css as my main entry-points into my web applications. So we'll start with something like this:
.
..
js/
css/
res/
index.html
index.css
HTML is useful for templating out the static content of our UI such as the navbar and page skeleton. In this example, we are going to ignore all of that so just start with a basic html template:
<html>
    <head>
        <script type="module" src="js/util.js"></script>
    </head>
    <body>
    </body>
</html>
We link javascript to html using <script> tags, and with es6 we still do this. In most tutorials, we set the <script> type attribute to be text/javascript, this tells the browser to interpret the linked file as javascript. In this example, we are setting type="module" this tells the browser to load the file as an es6 'module' and enables us to use that swanky new class syntax.
Loading and Creating a Class
Lets create the module we are going to load:
$ touch js/util.js
We will be defining the utilities we use to load the music data inside of util.js. Because util is a module, we will have to import it and perform our executions from it's constructor. Still in our html, in our script tag we can perform the following:
<script type="module">
    import { Util } from './js/util.js';
    window.onload = function() {
        console.log("loading");
        const util = new Util();
    }
</script>
Because we are declaring Util to a variable using new we will call it's constructor and store it as an object in util. You can only call a class through its constructor, and thus you must use new. If you were to load index.html in your browser at this point nothing will happen as we haven't actually written our module so lets get started with that.
Notice thewindow.onloadline.onloadis an event fired by the browser when a page is loaded.
We can hook into this event at any point in javascript and run code as a result of that event.
In this case, we are loading our class within theonloadevent so that we can make magic happen when a page loads.
Writing Javascript with Class
Lets get started on our Util module with just the basics:
export class Util {
    constructor() {
        console.log("utils constructor");
        this.create();
    }
    create() {
        console.log("creating util");
    }
}
Lets run through what we just did.
We created a class which defines an object called Util. Classes are required to have a function named constructor(), this is called when you declare Util using new. From our constructor, we are doing work (console.log in this case) and we are calling our first function.
Note: Here we prefix class with export what this means is that we can grab everything in this class from outside of this module. This is the Util in
import { Util } from './js/util.js';
We can grab anything exported from a class inside of the import { }.
Using QuerySelector to easily grab DOM elements
If you read web programming tutorials you will find a lot of people still use getElementById while this is still useful feels very limited to querySelector.
QuerySelector lets you grab dom elements using the same syntax that css uses to select elements. What this means if you do not have to put an id or class on every element you might want to interact with.
Consider the following HTML:
<div id="login-form">
  <input>...</input>
  <input>...</input>
  <button>Log In!</button>
</div>
If we used only getElementById we'd have to litter all four of these elements with their own id attributes, this means we would have to name 4 elements. And we all know what that means:
There are only two hard things in Computer Science: cache invalidation and naming things.
— Phil Karlton
With querySelector() we can easily grab the login button with document.querySelector('#login-form button');.
This grabs any and all <button> elements inside of any element that has an id="login-form" attribute.
Writing a 'Recent Listens' Widget
Now that we're brushed up on modern JavaScript, and we have a class loading on page load, lets dive back into our IDE's and pretend we're making something useful.
We will start with index.html
<html>
<head>
  <meta charset="utf-8"/>
  <script type="module">
      import { Util } from './js/util.js';
      window.onload = function() {
          // import line
          console.log("loading");
          // load class
      }
  </script>
</head>
<body>

</body>
</html>
Here we are defining a <script> with an attribute of module so that we can use import syntax. We are importing the Util class from ./js/util.js, and loading it. Reload the page and open devtools console (ctrl + shift + i) and be sure you see 'loading' printed in the console with no errors.
If we're still good at this point, lets create a basic Util class at /js/util.js:
export class Util {
    constructor() {
        console.log("utils constructor");
        this.create();
    }
    create() {
        console.log("creating util");
    }
}
This creates and exports the Util object we define. Util has the required constructor() function which calls the create() function.
Before we can use this class we need to import it, to index.html modify the content of the <script> tag with the following:
import { Util } from './js/util.js';
window.onload = function() {
    console.log("loading");
    const util = new Util();
}
This will load the Util class we wrote earlier into the variable util and call it's constructor using new. If you were to reload the page, and everything works correctly you should see the following in your JS console:
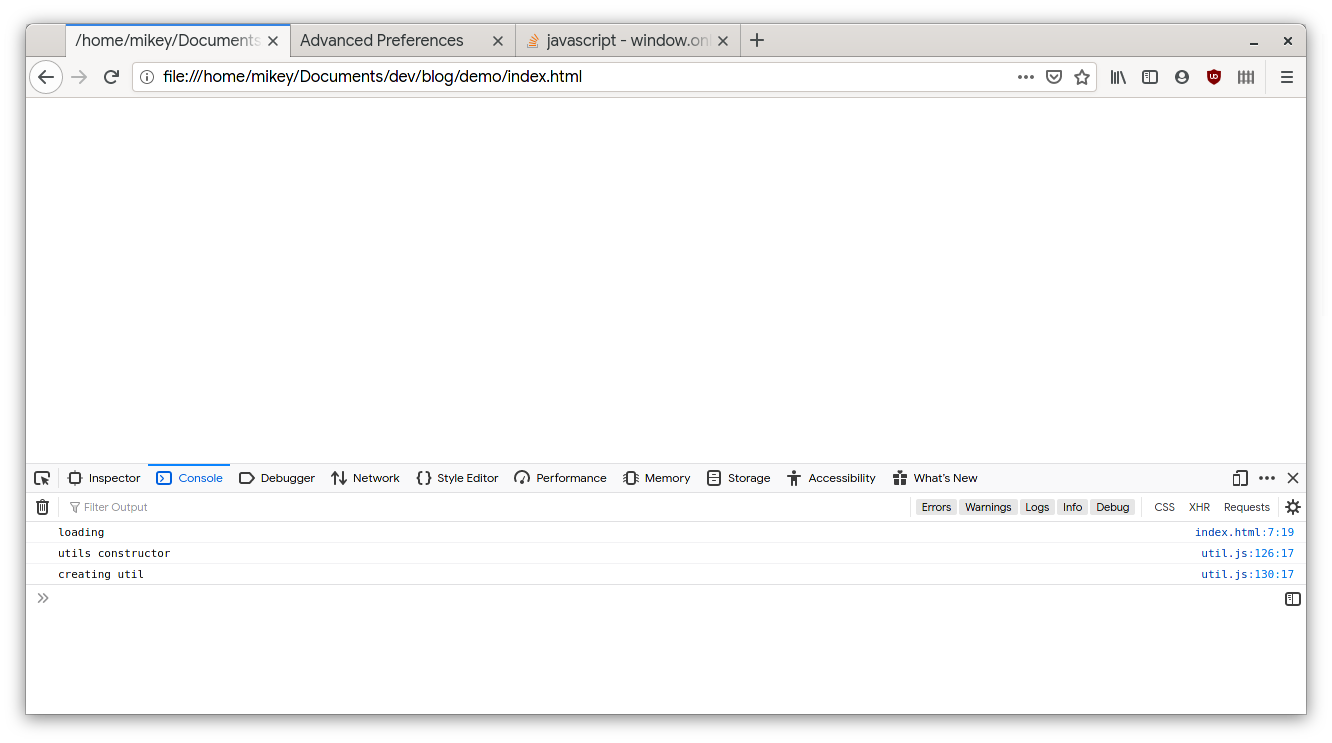
Great! Now we have both the constructor and create() loading. Lets add some more functionality to Util. I store my listen history on ListenBrainz by scrobbling my mobile phone so lets write a function to get this data.
export class Util {
    listens = null; // member object

    constructor() {
        console.log("utils constructor");
        this.create();
    }
    create() {
        this.getSongHistory();
    }

    getSongHistory() {
        let url = "https://api.listenbrainz.org/1/user/[listenbrainz-uname]/listens"
        console.log(`Getting listen history from:\n${url}`);
        fetch(url, {
            "method": 'GET',
        }).then((response) => {
            return response.json();
        }).then((data) => {
            console.log(`fetch got:\n${JSON.stringify(data)}`);
            this.listens = JSON.stringify(data.payload.listens);
        });
    }
}
You will want to put your ListenBrainz username in between the brackets if you want to test this code against your own data.
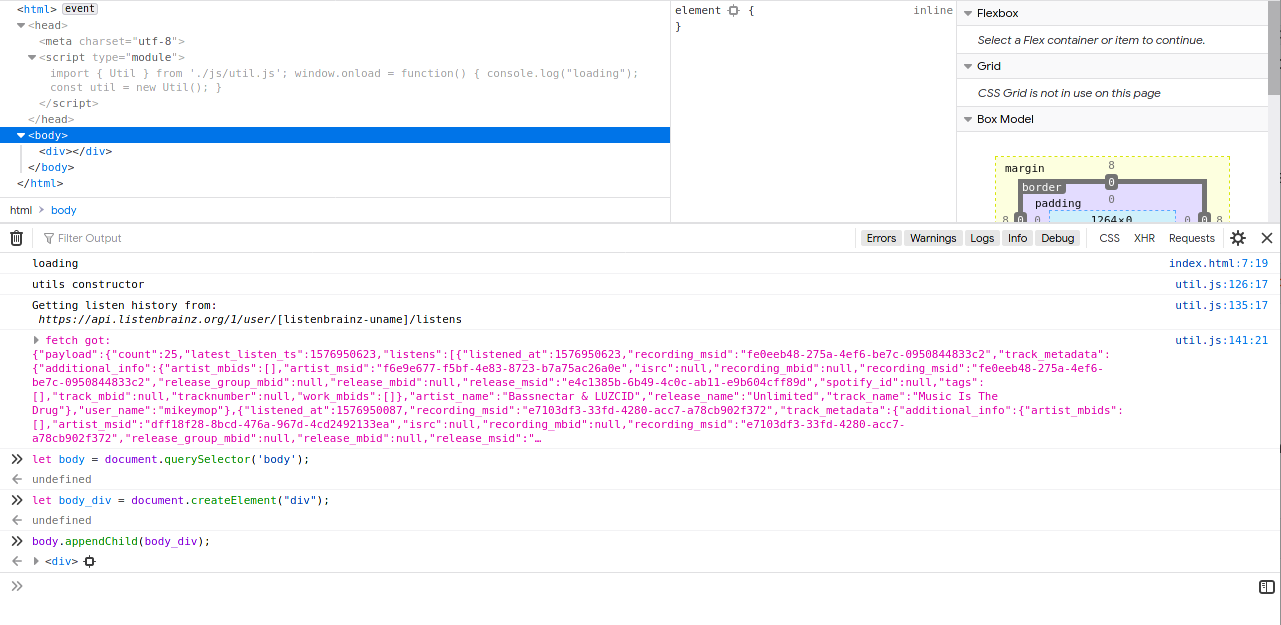
Once you reload the page, look in your js console, you will see that the ListenBrainz api returned us a JSON object containing a bunch of data in response to our GET request.
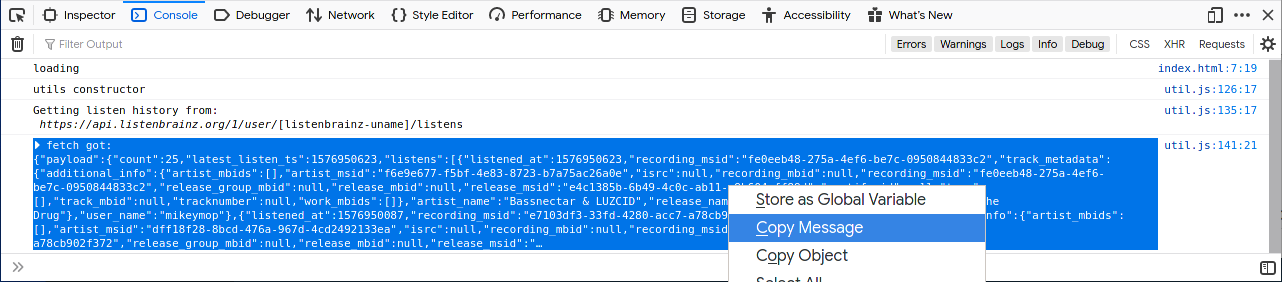
Click on the console entry with the JSON string. On the top left corner of the console entry click on the arrow to expand the entry. Next, right-click and select 'Copy Message'.
This is a large object so lets make it a little more readable using an online jsonlinter.
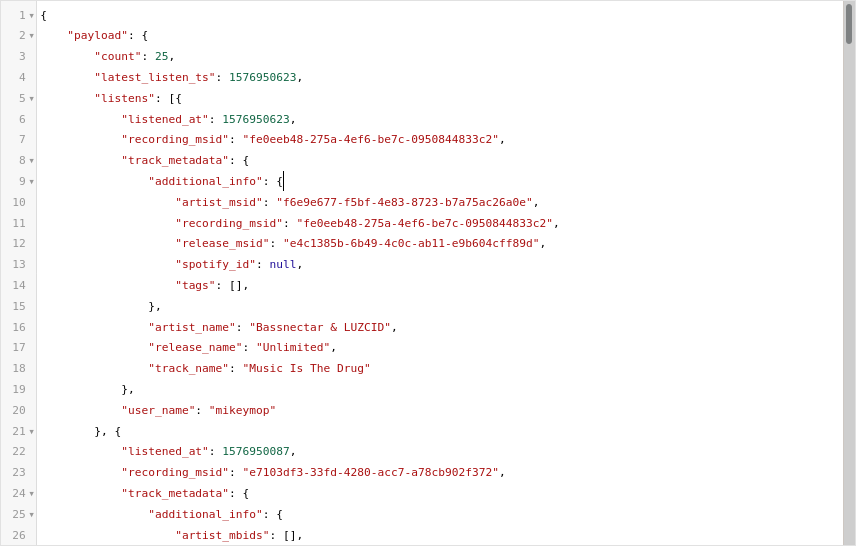
Note: The json contains a lot of null fields, I have erased most of them from the output so that we can see more of the JSON's structure in this image.
In this image we can see we are sent a JSON object, containing one field, payload. Furthermore, payload has four fields listens: [], count, and latest_listen_ts. Going even deeper, we can see that listens: [] is an array of json objects which represent a track.
Each index of listens: [] contains some fields that are important to us, specifically we will be using listened_at, artist_name, and track_name to keep things simple.
In JavaScript, if you point JSON.parse() to any string containing valid JSON it will automatically convert it into a Javascript object for you to work with. JSON field names are annotated using dot names just like classes. So we can get this information from the json we fetched using:
let listens = data.listens;
listens[0].track_metadata.track_name // gets the track_name from the first listen in the JSON payload
Writing HTML with JavaScript (the cool part)
Now that we know the data that we are working with. Lets start to write some HTML to represent this data. If we look in the devtools inspector we can see what our html looks like. Lets grab the body.
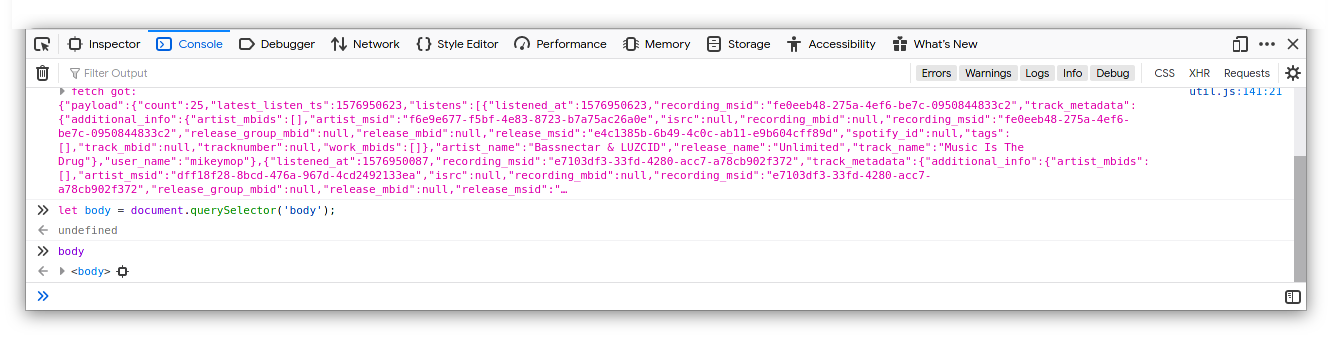
We can create elements inside the body using document.createElement(), lets put a div inside there for now to demonstrate the concept. We could do this by creating another element and appending it to body.
We still wont see anything on the screen because div is empty. We could create another html element but this would be several more steps. Instead, lets write the html inside of body_div directly:
body_div.innerHTML = `<p>Whoa did I <i>really</i> just do that?!</p>`;
Look at your screen now.
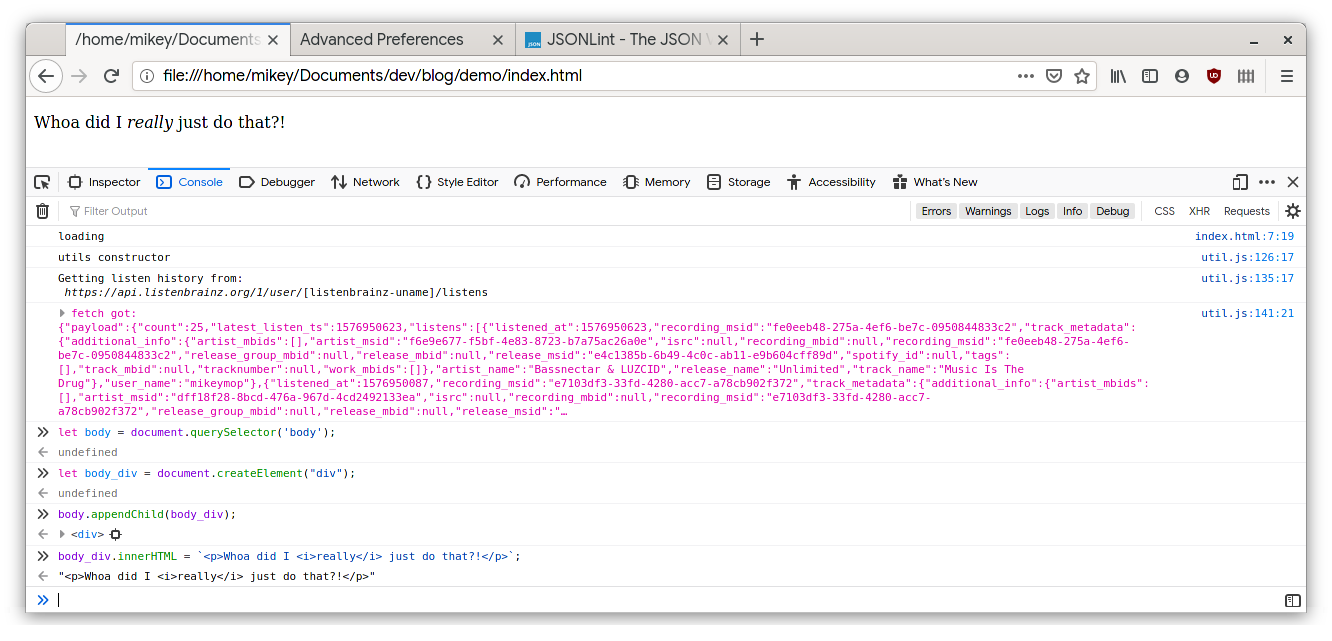
You can probably see now how using ES6 template strings, like in the above statement, is a really intuitive method for creating elements on the DOM.
Lets apply these concepts and build this:
<h3> Recent Listens:</h3>
  <div id="disclaimer">
    Listen history from ListenBrainz
  </div>
  <div>
    <table class="table" id="listens">
      <thead>
        <tr>
          <th>Listen Time:</th>
          <th>Artist:</th>
          <th>Song:</th>
        </tr>
      </thead>
      <tbody>
      </tbody>
    </table>
</div>
Building a Table
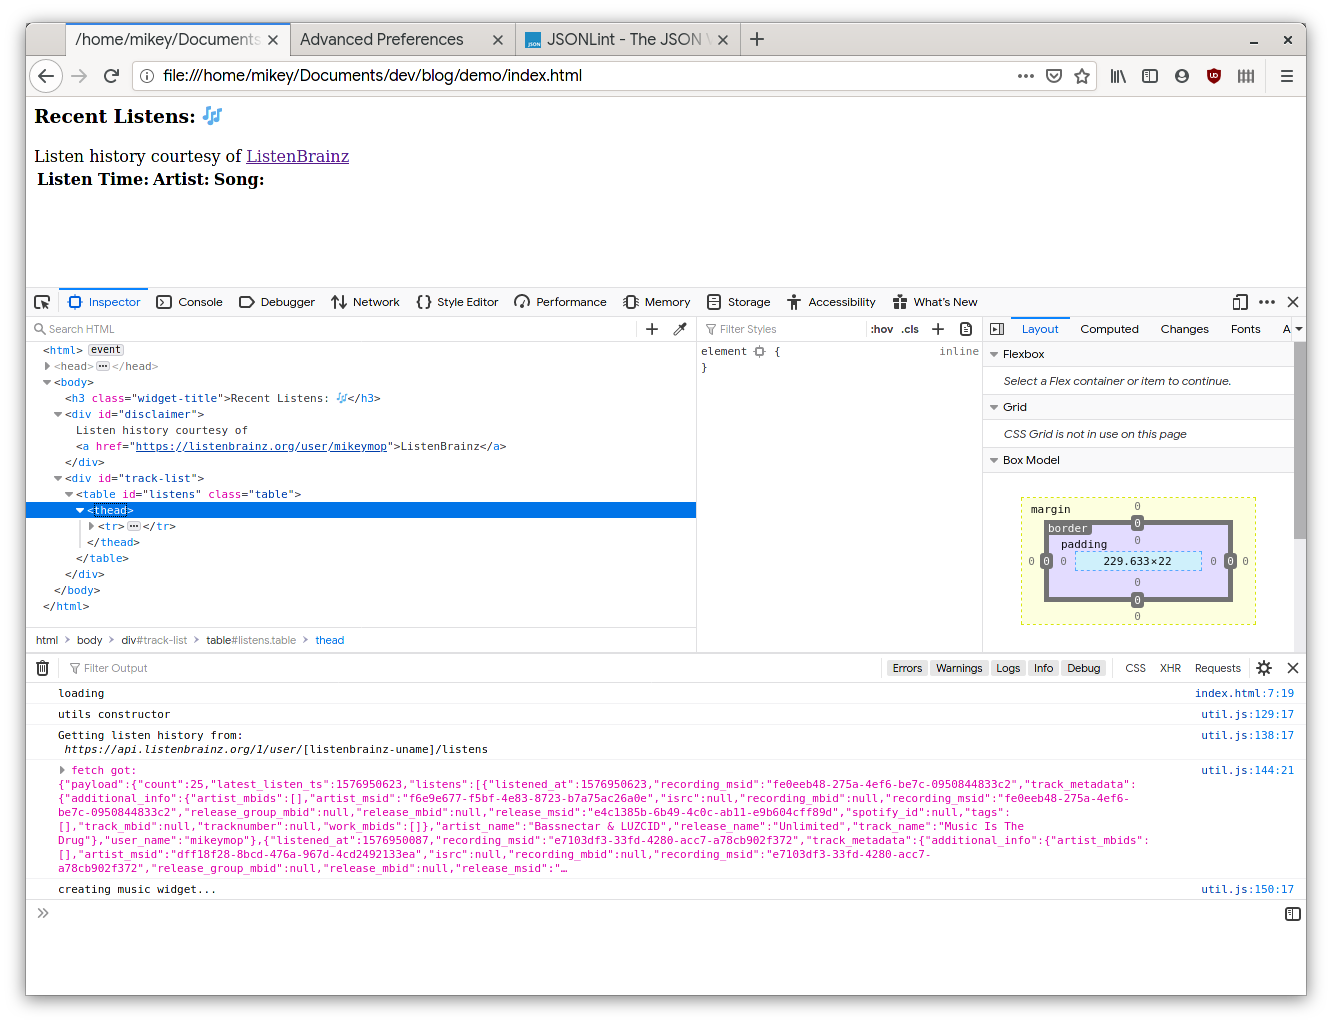
Now that we have the data we need, and can easily manipulate the html document, lets add a function to express our data:
createMusicWidget(data) {
console.log(`creating music widget...`);
let music_widget = document.querySelector('body');
music_widget.innerHTML = `
<h3 class="widget-title"> Recent Listens: 🎶</h3>
<div id="disclaimer">
Listen history courtesy of <a href="https://listenbrainz.org">ListenBrainz</a>
</div>
<div id="track-list">
<table class="table" id="listens">
<thead>
<tr>
<th>Listen Time:</th>
<th>Artist:</th>
<th>Song:</th>
</tr>
</thead>
</table>
</div>
`;
And call the function from create(), keen readers would notice earlier that in the fetch's promise chain I stored listens as a member object inside of this.listens.
create() {
    this.getSongHistory();
    this.listens = JSON.stringify(data.payload.listens);
    this.createMusicWidget();
}
So now we have an empty table, and a bunch of data, we can use ES6 iterators, or c-style for loops to iterate over listens: [] and create a table row for each index of listens: []. Lets set ourselves up for that. Add the following to the end of createMusicWidget()
let data = JSON.parse(this.listens);
let table = document.querySelector('.table');
let tbody = document.createElement('tbody');
let i = 0 // keep track of iterations

for (let entry of data) {
    console.log(`Adding ${entry.track_name}`); // this.addRow(tbody, entry, i);
}
table.appendChild(tbody);
Refreshing the page will show in the js console that we now can iterate over our data and print the track information. Lets write an addRow() function to add rows to our table.
addRow(tbody, entry, idx) {
    let track = entry.track_metadata;
    console.log(`addrow: ${JSON.stringify(track.track_name)}`);
    let row = document.createElement("tr");

    row.innerHTML = `
      <td>${entry.listened_at}</td>
      <td>${track.artist_name}</td>
      <td>${track.track_name}</td>
    `;
    tbody.appendChild(row);
}
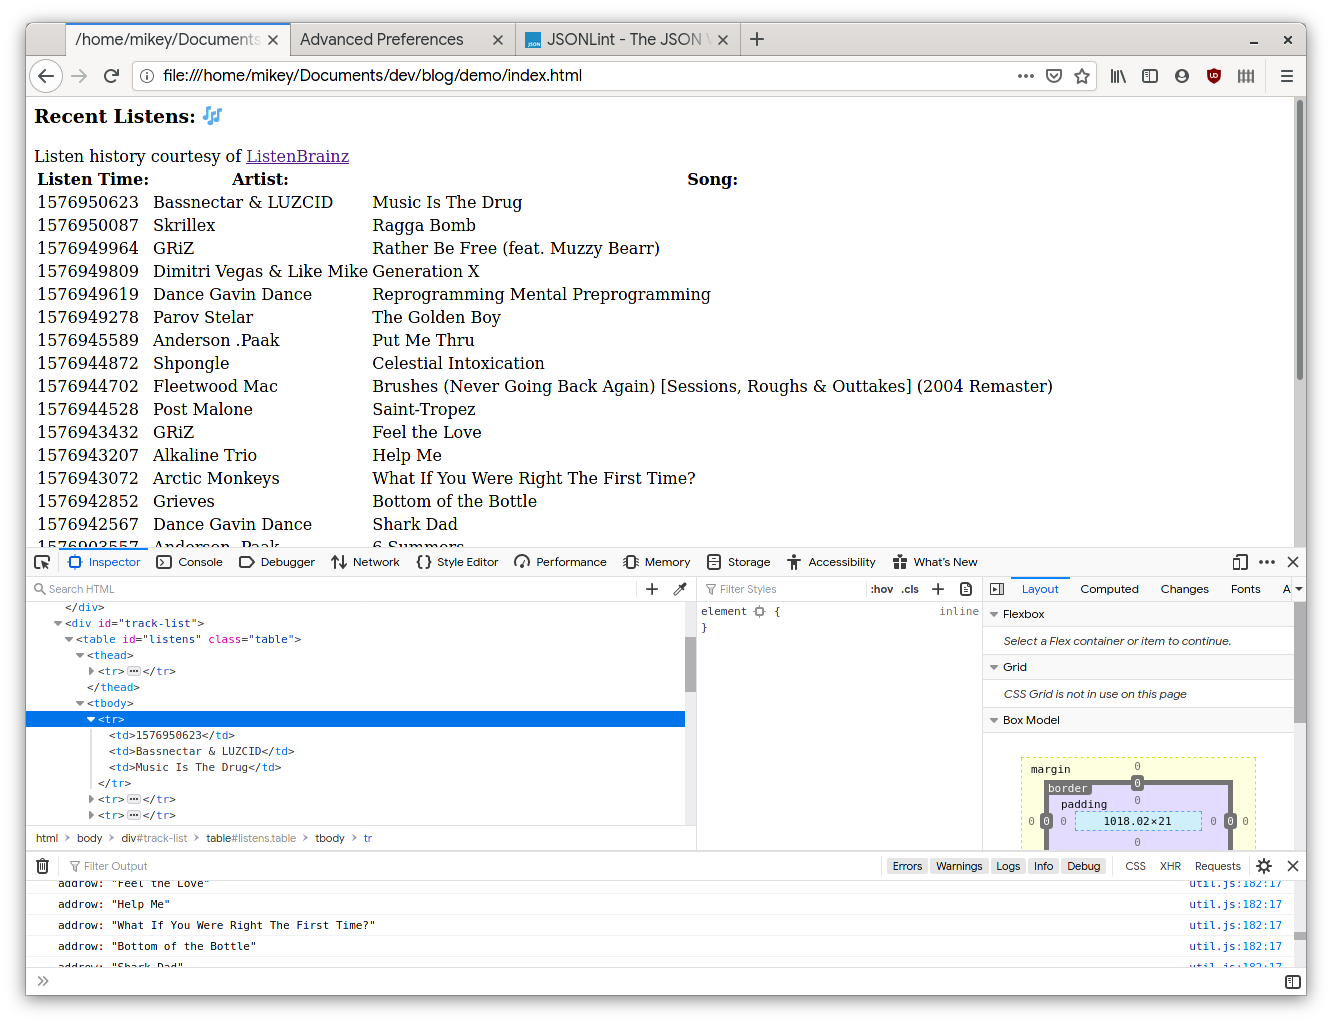
Refresh the page and you can see that we're getting somewhere. We now have the table rendered with three columns.
The first column containing the timestamp, the second column containing the artist's name, and the third column containing the track's name.
Timestamps for Humans
You can probably see that the timestamps dont make any sense. Turns out they actually do, the numbers you see represent timestamp formatted as unixtime and actually the seconds since the Unix epoch.
In javascript, handling timestamps are made very easy thanks to the Date object built into modern browsers. If were to take the first timestamp 1576950623 and manipulate it with Date we could easily get a human readable date:
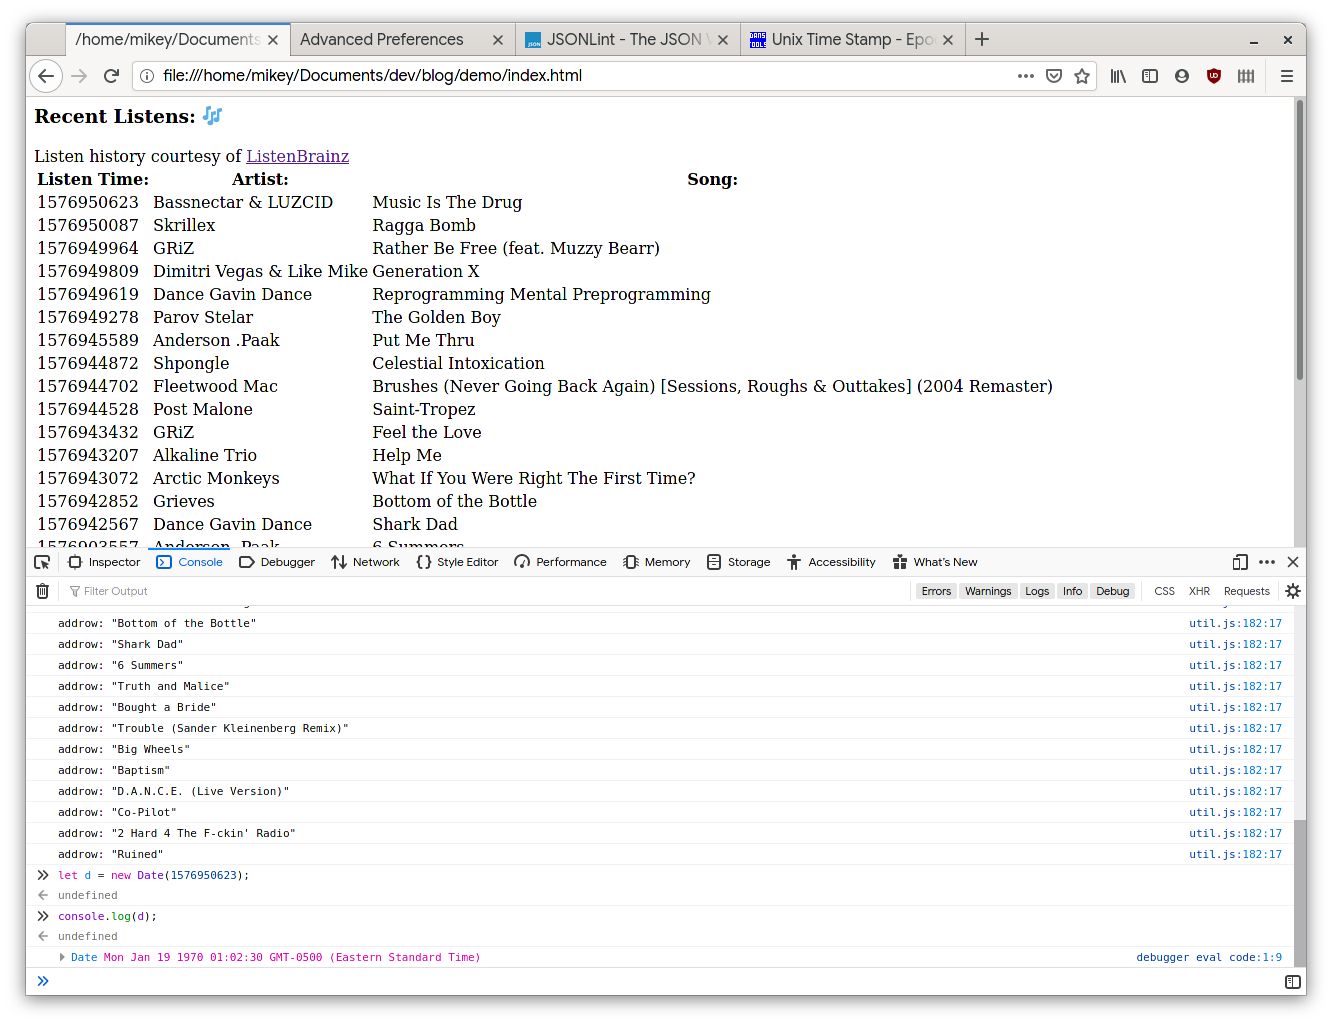
You are probably thinking "wait, that date is in 1970, and that song isn't that old". It turns out Javascript and Unix start counting at different times. We can see this in the js console:
> Date(0);
"Sat Dec 21 2019 16:14:04 GMT-0500 (Eastern Standard Time)"
We can easily do the conversion by multiplying our date by 1000.
> let d = Date(1576950623 * 1000);
> console.log(`Today is ${d.getMonth()+1}/${d.getDate()}/${d.getFullYear()}`)
Today is 12/21/2019
We can now interpret the timestamps properly, however, Date doesn't provide a way to get a month's name from the timestamp.
We could write a simple enumerator to handle this, however, lets not pollute our functional code with both the unixtime and month name conversions.
Instead let use ES6's extend syntax to add the functionality to the already existing Date object.
Extending the Date object
When writing a class, we can extend an existing object by following it's name declaration with extends, and calling super() in the class's constructor.
Lets extend Date with a class name TimeStamp , give it a property named unixtime and store the converted unixtime value in that property.
Next lets add a function named getMonthName(), which matches Date's naming conventions, to the TimeStamp object.
export class TimeStamp extends Date {
    unixtime = null;

    constructor(time) {
        //takes unix time and makes into a datetime
        super();
        this.unixtime = Number(time) * 1000;
    }

    getMonthName() {
        let months = ['Jan','Feb','Mar','Apr','May','Jun','Jul','Aug','Sep','Oct','Nov','Dec'];
        let a = new Date(Number(this.unixtime));
        let month = months[a.getMonth()];
        return month;

    }
}
Now, when we call getMonthName() it will return the name of the month we stored in the TimeStamp object. In only a few lines we can implement this into our Util class and see the fruits of our labor on the page.
At the top of js/util.js import our new TimeStamp class:
import { TimeStamp } from './date.js';
We will want to declare a new TimeStamp in our addRow() function:
addRow(tbody, entry, idx) {
    console.log(`addrow: ${JSON.stringify(entry.track_metadata.track_name)}`);
    let track = entry.track_metadata;
    let row = document.createElement("tr");
    let t_stamp = new TimeStamp(Number(entry.listened_at));

    row.innerHTML = `
      <td>${t_stamp.getMonthName()} ${t_stamp.getDate()} ${t_stamp.getFullYear()}</td> // See Note
      <td>${track.artist_name}</td>
      <td>${track.track_name}</td>
    `;

    tbody.appendChild(row);
}
Note: Notice, I have also updated the first column's HTML to use the console.log template string we used to produce the human-readable date.
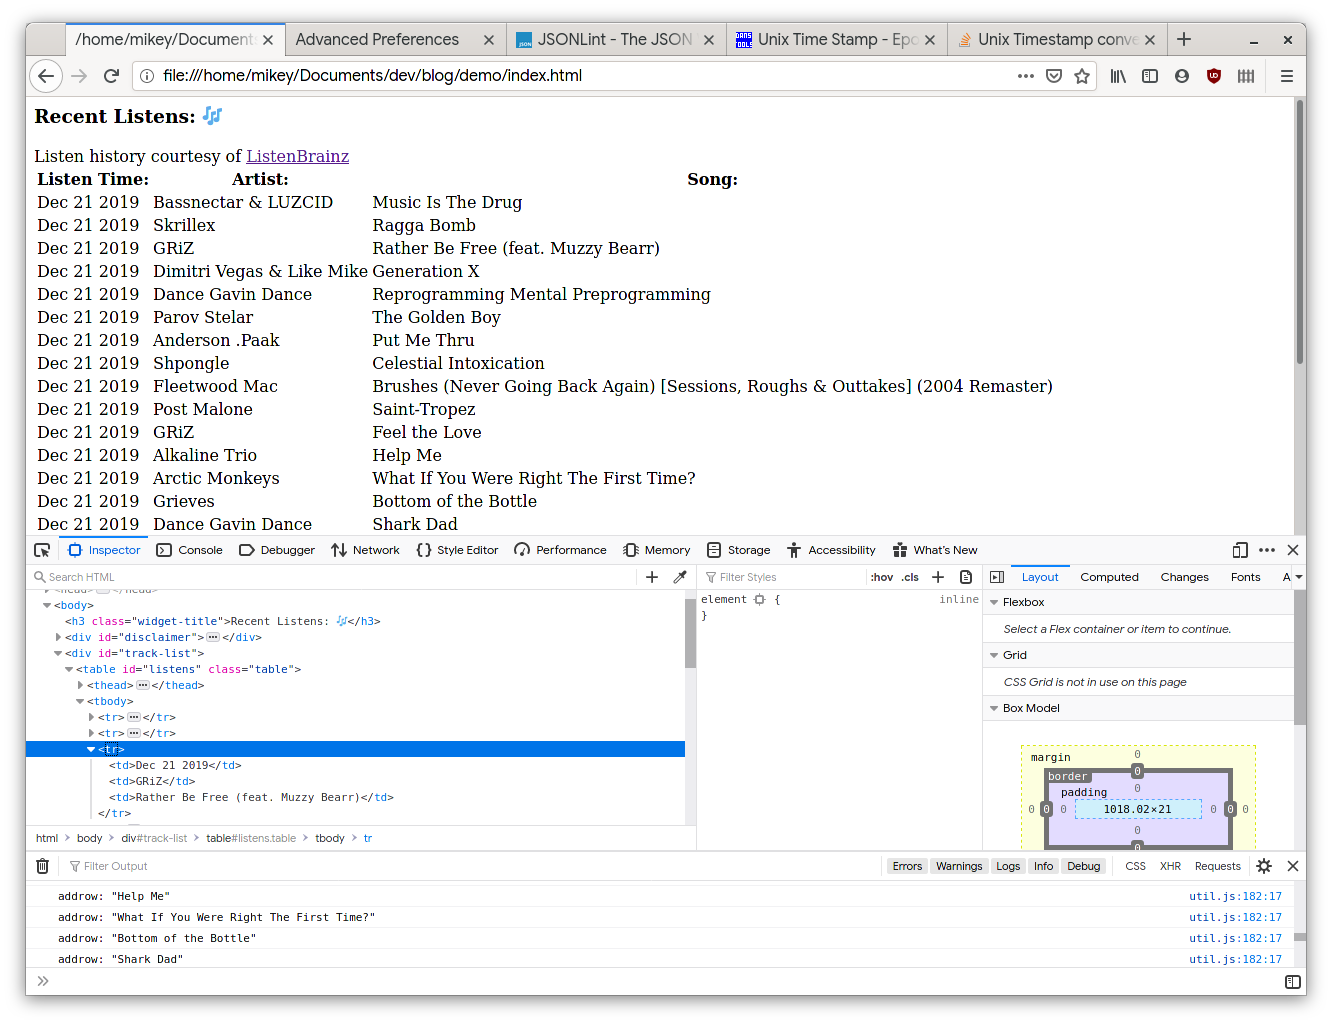
Refresh the page and you should see the proper date next to the listen times.
What Did We Learn?
- We dont need fancy libraries like react.js to write simple Single Page Applications (SPA)
- ES6 templated strings offer a creative and intuitive way to express HTML from JavaScript
- ES6 classes can give us a ton of functionality in only a few lines of code
- How to extend a class in ECMAScript 6
- How to work with JSON in Javascript
If you get a little creative, you can create feature full javascript applications without needing to use React.js or other large Javascript Frameworks. I hope this article inspires you to be more creative when you approach Web Development.